Choose a bin and a place for it
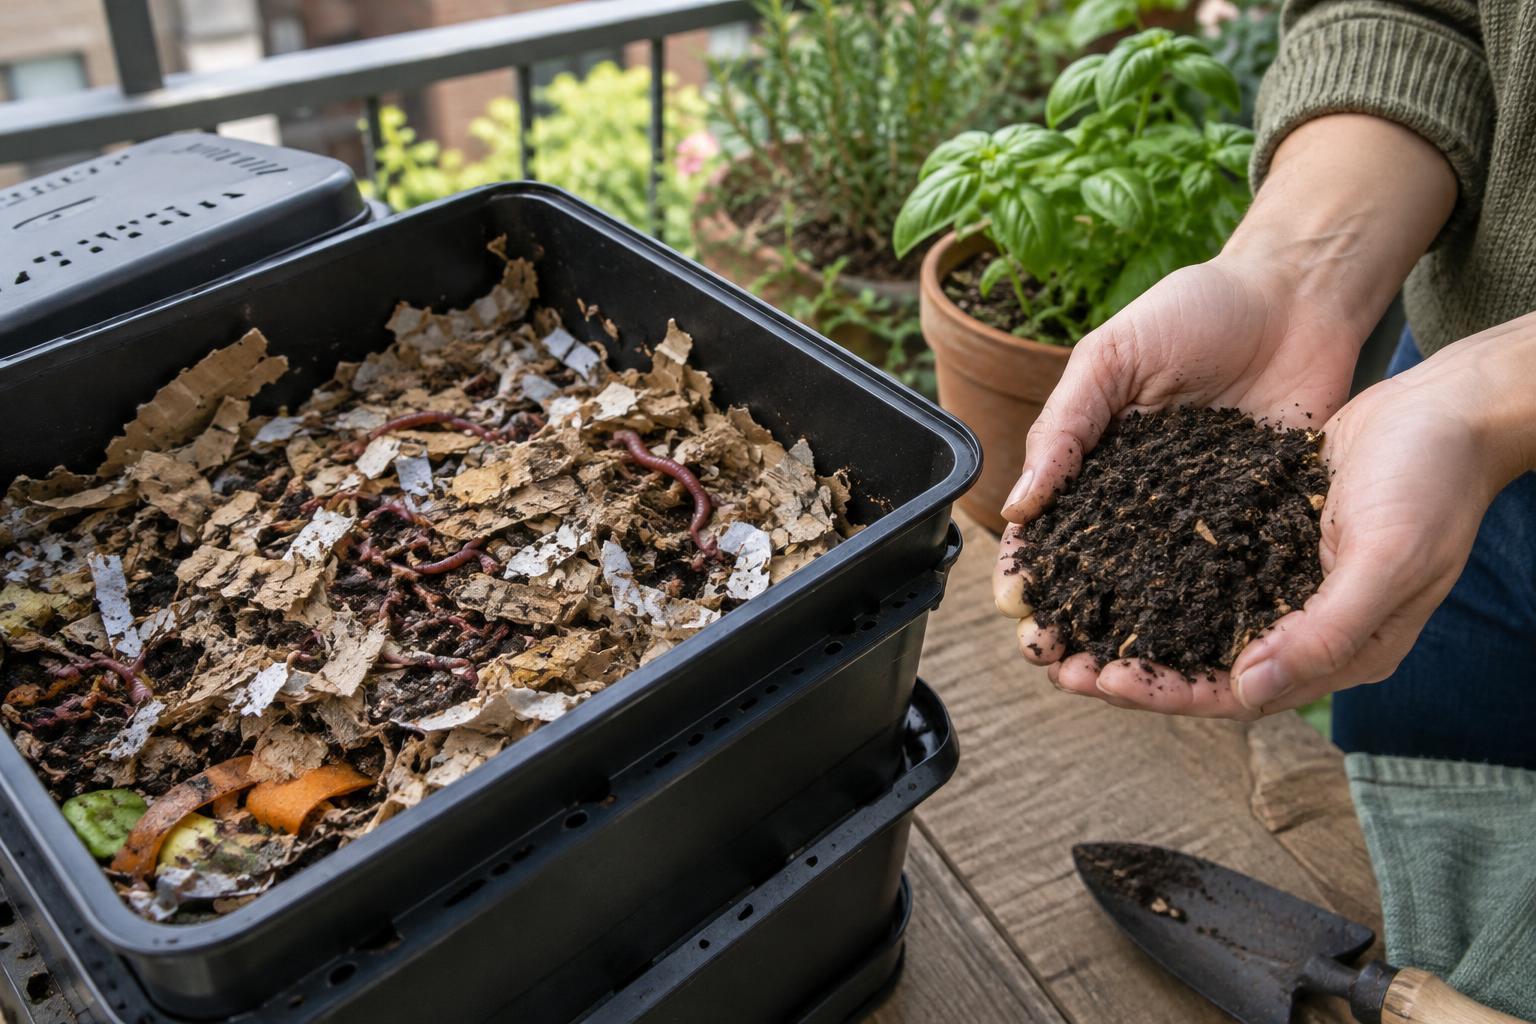
Vermicomposting uses composting worms to help break down food scraps and bedding into a dark, crumbly material commonly called worm castings. It suits a small household or garden group that wants to process scraps gradually rather than build an outdoor compost pile. A bin can fit under a counter, in a utility area, or in another sheltered spot where it will not be exposed to direct sun, freezing conditions, or intense heat.
Choose a sturdy, opaque container with a secure lid and enough surface area to spread food thinly. Small air holes near the top help the bin breathe; cover them with fine mesh if insects are a concern. Some bins have drainage holes and a tray underneath. If yours does, empty the tray promptly rather than letting liquid stand. A properly managed bin should feel damp, not waterlogged, and should not need to produce a steady stream of liquid. Red wigglers are commonly used for worm bins because they live in decaying material near the surface; ordinary garden earthworms are not a direct substitute.
Build bedding that holds moisture and air
Start with a generous layer of loose bedding before adding food. Shredded plain cardboard, torn uncoated paper, and dry leaves are useful options. Moisten them until they feel like a wrung-out sponge: damp throughout, with no water dripping when squeezed. Fluff the bedding so air can move through it, then add the worms and let them settle under the surface.
Bedding is more than packing material. It absorbs moisture from scraps, gives worms room to move, and helps keep the bin from becoming a dense mass of food. Add fresh, damp bedding whenever the contents look compacted or scraps are becoming exposed. If the bin is soggy, mix in dry shredded cardboard and pause feeding until conditions improve. If it feels dry, add a little water or damp bedding, checking again after the moisture has spread.
Feed slowly and keep scraps covered
Begin with small amounts of fruit and vegetable scraps, coffee grounds, and crushed eggshells. Chop larger pieces if you want them to break down more readily. Bury each feeding beneath bedding in a different part of the bin. Before adding more, look for signs that the previous food is disappearing; the right feeding pace depends on the number of worms, the bin’s conditions, and the type of scraps.
Leave out meat, fish, dairy, oily foods, and pet waste. They can create odors or attract pests and are poor choices for a small bin. Use strongly scented scraps, such as onions and citrus peels, sparingly while you learn how your bin responds. If food remains untouched for a long time, remove the excess and feed less next time. A mild earthy smell is normal; a sour or rotten smell usually means the bin needs less food, more bedding, or better airflow.
Troubleshoot before problems spread
Fruit flies often appear when scraps sit on the surface. Bury food completely, keep the lid fitted, and avoid adding more than the worms and other decomposers can handle. If worms gather on the walls or repeatedly try to leave, check for soaked bedding, drying, overheating, or a buildup of uneaten food. A few worms exploring a new bin is less concerning than a persistent attempt to escape.
In a shared garden, make bin care easy to hand off. Label the approved scraps, keep a container of dry bedding nearby, and agree on who checks moisture and removes excess food. One person adding a large bag of scraps can overwhelm a compact bin. Simple routines make the project more reliable than trying to calculate an exact feeding schedule.
Harvest castings and put them to use
Harvest when much of the original bedding has become dark and fine-textured, leaving relatively little recognizable material. To separate castings, move the finished material to one side of the bin and place fresh bedding and food on the other. Over time, many worms will move toward the new food. You can then scoop out the finished side, returning any worms and large unfinished pieces you find. A handful at a time is also fine if you do not need a full harvest.
Mix finished castings into garden soil or add a modest layer around established plants, then cover them with soil or mulch. Castings are a soil amendment, not a complete replacement for soil or a guarantee that plants need no other care. If the harvested material is wet, smelly, or full of recognizable scraps, return it to the bin for more time. Keep the bin going by replacing harvested material with fresh bedding and continuing to feed at the pace it can manage.